Sunday, October 13, 2013

Artisan Sourdough - Part Seven: The Bread

It's been quite the journey, but we did it! We have just created food from (virtually) nothing. What began as a cup of foamy yeast culture has, through much care and work, become tasty sourdough bread.

From this...

To this, in just six easy steps!

Look at that. Just look at it. Isn't that something? Just flour, water and a little fruit juice is all that went into those. Everything else was just a little time and effort. That's about as simple as it gets... just like it's been done for centuries. That is the key to artisan bread. Made by hand, start to finish, by a single human being that honestly cares about his or her craft. It doesn't get much better than that. 

The color and texture is close to perfect.

Crusty close-up.

These loaves in particular are some of the best I've made. The rise was perfect. The proof was perfect. The oven spring was just right. The vents were cut deep enough to get a good bloom as the crust set. The crumb is light and airy, not very open but the consistency is soft and spongy, like storebought bread, but without the preservatives. 

*Drool*

Better view of the crumb.

To clarify, "crumb" is a term bakers use to define the inside of a loaf of bread. There are many things a skilled baker can tell by examining the crumb-- from the type of flour used to how wet the dough was before baking. Usually, I produce breads with a rather dense crumb, indicating a low-moisture dough. This time, however, I tweaked my usual formula by increasing the overall amount of water by about one cup. That in combination with a nice long autolyse (one hour) are likely the primary reasons this batch came out so well. Goes to show you (me too!) what good gluten formation can do for your bread. 

Flavor-wise, the sour notes are a bit understated in these loaves. While still being very tasty, I think the flavor could have benefitted from a retarded proofing in the fridge instead of at room temperature prior to baking. Still very good bread by any definition, I'm quite proud of these. 

Here's the breakdown:

Color    - 9/10
Texture - 9/10
Crumb  - 8/10
Flavor   - 6/10
Aroma  - 8/10

Out of a possible 50 points, this batch scores a 40 without breaking a sweat. Easily top-tier bread as far as my kitchen is concerned, and it seems to get a little better every time I make it.

That concludes my series on artisan sourdough. I hope you've enjoyed reading this as much as I've enjoyed writing it. Baking is a passion of mine, and it's a passion I like to share... because if I can do it, anyone can do it.

And I hope you do. 


-Sherman


Artisan Sourdough - Part Six: The Bake

The time has come to reap the rewards of all this hard work! The wonderful aroma emanating from the oven,  fielding numerous questions like "what smells so good?" followed quickly by "when can we eat it?", baking bread is a process that fills a house with expectation. I'm sure by now you're ready to eat something made from scratch, by hand and with great care... which is something you usually don't find at your local grocer. Let's do this.

Remember these guys?

Proofing time approx. 90 minutes.

Now that we have proofed loaves, we need to get the oven going. Ovens tend to vary widely in performance, so it may take a few bakes before you dial in the perfect temperature and time in your own kitchen. Set one of the racks in the middle and one as low as it will go, and preheat to 500 degrees (F). Place an empty 9" cake pan on the bottom rack, which we will put to use momentarily.

This little guy is important.

The last two things we need to do before these loaves bake is venting and glazing. Venting allows the steam an easy escape route and helps prevent the tops of the loaves from cracking and splitting, and when done right it adds to the appearance of the finished bread. Glazing imparts moisture or oil to the tops of the loaves, further preventing cracking and also adding to the color of the crust. I use butter for this, but egg whites, olive oil or even plain water can be used, to varying effect.

To vent the loaves, we'll need a sharp knife or razor blade. Razor blades do the job best, but given the proliferation of disposable shaving implements, we're more likely these days to have a knife on hand. I use my trusty bread knife, as I've found it works just as well cutting dough as it does cutting bread. For loaves of  this size, we're going to make three diagonal cuts in the dough, running lengthwise down the loaves. Don't be afraid to cut deep! Ideally the cuts will be roughly 3" in length and 1" in depth.

You can see where the knife pulled the dough a little.
A bit of oil on the blade helps.

For glazing I melt 1/2 stick of salted butter (1/4 cup) in a microwave-safe container, and coat each loaf generously with a basting brush. There will still be some butter left after doing this, set it aside as we'll be using it again shortly.

Baby, I'm gonna butter your bread.

The final step is to get these babies in the oven. Place the pans in the center of the top rack, leaving about 3-4" of space between them. Pour one cup of plain water into the cake pan on the bottom rack (watch for steam, it burns!) and close the oven. Reduce the temperature to 425 degrees (F) and set a timer for 20 minutes.

Things are about to get steamy.

The purpose of the water in the cake pan is to maintain a high humidity level inside the oven during baking. This is most important during the first few minutes the loaves are in, during a process known as "oven spring". Oven spring is the final bit of rise that will happen as the moisture in the dough evaporates and expands as it heats. We want the humidity in the oven as it helps the skin of the dough remain pliable during the oven spring (further reducing cracking/splitting), and it also helps to promote that chewy crust I mentioned earlier, keeping it from drying out and hardening as the bread bakes.

After the oven spring. Very nice!

When our twenty minutes have passed, open the oven and once again glaze the tops of the loaves with the remaining butter. Our bread now looks much like it will when finished, on the outside, at least. It will still need another 20-25 minutes at 425 degrees (F) for the crumb to set properly and the sides and bottom to brown a bit.

Once we've passed the 45-minute mark, our loaves should be ready to come out of the oven and cool. The tops should be golden brown, and the sides and bottoms should be a light brown (which we can see once out of the pans). Allow the loaves to cool on a rack or towel for about 30 minutes, or until no longer warm to the touch. Don't try to cut a hot loaf! Not matter how sharp the knife, until that bread cools it will want to mash instead of slice. We need to give the crumb time to cool so the loaf will cut properly.

If these taste as good as they look, we're in for a treat.

Finally, it is time to eat! Join me for the final installment of this series where we take a detailed look at the very loaves I baked for the articles.

Next:
Part Seven - The Bread
Previous:
Part Five - The Rise

Artisan Sourdough - Part Five: The Form

Now that our dough has risen nicely, it's time to get to business. We need to form some loaves, but first we have to work the dough just a little more.

They grow up so fast...

By this point in time, our ball is full of little pockets of carbon dioxide and is smelling very much like bread. It looks wonderful, sitting in that bowl all plump and doughy... and now we're going to punch it. That's right, punch it down right in the middle of the ball. What we're doing here is known as "degassing", or releasing the excess CO2 that has built up as the yeast has been busy with further fermentation. Here is another step in which artistry comes into play-- depending on the intended result, we may need to de-gas to a greater or lesser extent. For lighter breads with an airy, open crumb, we would like to retain a good number of gas pockets in the dough, as they'll expand during baking to give us our desired consistency. For denser breads (such as bagels and pumpernickel) we're going to want to work the dough a bit more to collapse more of the pockets before baking.

Punch it!

For my sourdough, I shoot for the middle of the road, degassing the dough with an initial punch-down, turning the ball out onto a floured surface and then retaining the remaining gasses by employing a method known as folding the dough. Folding works much like it sounds, you continually fold the dough over, pull and stretch it out, and fold again. Try not to overwork the dough... even for dense breads we still want some of the gas to stay behind.

Stretch...

...and fold.

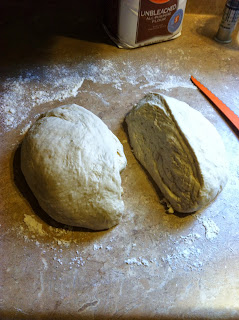
Once we've worked the dough for a minute or three (you'll develop a "feel" for the dough that will help determine when it's "ready"), shape it into a ball and divide it in half. Some bakers employ a kitchen scale for measuring ingredients and portioning dough, but I like to keep things simple and do it by eye. This generally results in one of the two loaves being a bit larger than the other, but that's perfectly okay.

Separated at birth.

While I do enjoy shaping loaves by hand for a more "rustic" bread, for the sake of predictable outcomes I'll be using my trusty loaf pans. Even though the pan will help dictate the shape of the loaf, there's still a bit of work to do before anything goes into the oven. Take the portioned dough, one piece at a time and start working the ball into a cylindrical shape, roughly as long and wide as the bottom of our loaf pans. With our hands palm-up, make a motion similar to if you were scooping water up into your hands, stretching the dough from about the mid-point of the cylinder and tucking it under the bottom (see picture below).

If I weren't holding the camera, there'd be another hand on the other side
of that ball, trying to show you what it is I'm talking about.

What we're looking for here is surface tension, and why good gluten development is so vital. Dry or underworked doughs will tend to tear as opposed to stretching, and we need it to stretch. Continue with the motion described above until the top of your loaf is stretched smooth and the dough feels "tight". This tightness promotes a crust that is chewy without being crumbly, which for my taste is perfect for this sourdough.

Grease the loaf pans and place the dough centered in the bottom of each one. Lightly drape a kitchen towel over the pans and let them sit at room temperature for about an hour, or until they've once again doubled in size. This final rise is known as "proofing" the dough, or the final rest period before baking. It is possible and sometimes desirable to retard the proofing process by refrigerating the dough at this point. The low temperatures will slow the reproduction of the yeast and facilitate the further growth of lactobacilli, lending a more pronounced sour flavor to the dough. In this case, we will proof the loaves at room temperature as we should have developed quite a bit of flavor just by aging the starter before we began. If you find you'd prefer more sour in your sourdough, feel free to experiment with retarding the proof, and as always... enjoy the results!

Ready for the final rise (proof).

We're now ready to move on to last bit of kitchen wizardry and bake some bread!

Next:
Part Six - The Bake
Previous:
Part Four - The Rise

Artisan Sourdough - Part Four: The Rise

Now we move on to bigger things, quite literally. That ball of dough is going to grow quite a bit over the next couple of hours as a few things are happening. The yeast is quite busy working on all of that flour we gave it in the previous installment, creating more carbon dioxide bubbles and compounds that further develop the flavor of the bread. The CO2 is pushing against the gluten, remaining trapped in the dough and causing it to rise. And we're daydreaming about the bread we'll soon be eating, since there really isn't much for us to be doing while all this is happening.

Our dough as we last saw it.

What we're waiting for at this point is for the dough to roughly double in size, which can take anywhere from 45 minutes to a few hours. At least once I can recall letting it sit overnight, likely due to low temperatures retarding the yeast's activity. If it is a pleasant day, I will often sit the covered bowl outside and let a warm afternoon speed things up a bit. Ideally, we want an ambient temperature above 70 degrees (F) for the rise.

About two hours later... IT'S ALIVE! (evil laugh)

While some breadmakers have developed their own techniques that involve several rises, my method requires just two-- the first rise we are doing now, and a final rise after shaping but before going into the oven. Once our dough has grown to twice it's original size, we're ready to move on to forming loaves.

Next:
Part Five - The Form
Previous:
Part Three - The Dough

Artisan Sourdough - Part Three: The Dough

With our culture slumbering away in the refrigerator and our starter aged to perfection, we have finally come to the point where science begins to yield to art. Yes, friends... today is baking day! But first, we have to make dough.

Here's what we'll need for this step:


  • Our sourdough starter from Part Two.


  • 5 cups of flour


  • 2 cups of water


  • 1 Tablespoon of salt


  • Large mixing bowl (4 quart capacity or larger)

Simplicity.

The first order of business is to combine the flour and water in the bowl until it forms a sticky ball, and let it sit. That's right, more waiting! At least fifteen minutes, and as long as an hour (this is where the artistry comes into play). Much of what happens beyond this point when I bake is based on sensory perceptions: how the dough looks, feels and smells. The length of time our ball of flour and water sits in this state is completely up to us, though that doesn't diminish the importance of this step when compared to everything else we've done up to this point.

What we're doing now is referred to in the baking world as to autolysis (from latin, meaning "self-destruct"). The reason we want to autolyse is an important one: gluten. Gluten is a strong, stretchy protein that is formed when we mix flour and water, and is what gives helps to give our bread it's structure. In commercial bakeries and modern kitchens, most of the gluten formation occurs in the stand mixer. Part of the joy I find in artisan baking is in doing things the old way... meaning no stand mixer here! So, how do we get a well-formed gluten without turning our arms to rubber stretching and kneading by hand? We autolyse.

Back in the old days, the village baker didn't have a mechanical mixer to help produce food for everyone. They also didn't have all day to spend kneading out enough dough to feed a village, what with all the actual baking needing to be done. The solution was to autolyse (though the term was applied to baking by Raymond Calvel in the 1700's, the process has likely been in use for as long as leavened breads have been made). By mixing just the flour and water and letting it sit for awhile, we allow the moisture to activate the enzymes in the flour that will form the gluten, greatly reducing the amount of kneading needing to be done later. Just let it sit for a bit, and nature does the rest.

Just water, flour and a little time.

Our starter is ready to get started.

At this point I give the starter a stir, releasing any gas bubbles in the mixture. It should be a smooth, creamy dough, thick like cake batter but without any lumps. Add this and the salt to our bowl containing the autolysed dough, and mix well. We're looking for a uniform distribution of all ingredients to ensure that the dough rises evenly and bakes well. Get your hands in there and work that dough! You'll likely notice once everything is mixed well that the dough is firm and stretchy... that's our gluten! It is okay at this point to add a little flour or water while mixing to attain the perfect consistency for our dough (some prefer a wetter dough, some like it a bit dry-- it's entirely subjective), generally you're looking for it to start pulling away from the sides of the bowl as you work it... not too sticky, not too dry. Form the dough into a ball, pour about a tablespoon of oil in the bottom of the bowl and turn the ball a couple of times to coat both it and the bowl. This will keep the surface of the dough from drying out during the first rise, and keep it from sticking to the bowl. Cover with a towel and let sit for at least an hour.

Adding starter to the autolysed dough.

Ready to rise.

Next:
Part Four - The Rise
Previous:
Part Two - The Starter


Monday, October 7, 2013

Artisan Sourdough - Part Two: The Starter

It has been said on many occasions that baking is as much an art as it is a science. Given my years of experience as a breadsmith, I'd say breadmaking starts at 75% science, 25% art, and ends at 75% art and 25% science. As with step one, step two involves some good old-fashioned biochemistry.

The makings of a sourdough starter.

The distinct flavor of sourdough bread is derived from a properly aged starter or "sponge". Yes, unfortunately we're still at least a day away from even preheating the oven. No time to fret, though-- we've got a starter to make.

Here's what we'll need:

  • 1 cup of yeast culture, room temperature. (If your culture hasn't been fed recently, remove from the refrigerator, halve and feed equal parts flour and water in an amount sufficient for the recipe; in this case I'm looking to make two medium loaves.) 


  • 1 cup of flour (as I mentioned in the previous section, pretty much anything but self-rising flour)


  • Bowl or container, 1-2 quart capacity


First, combine the culture and flour in the container, mixing until smooth. Cover loosely and let sit at room temperature.

Here is where the magic happens.

Now that everything is mixed evenly, all that is left to do is wait. Over the next few hours, the yeast is going to begin reproducing quite rapidly, initially respiring aerobically until the oxygen is depleted, producing carbon dioxide and water, then begininng to ferment- where the carbohydrates and simple sugars in the flour are converted into ethanol, lactic and acetic acids, among other compounds that lend flavor to the final product. 

Within two to six hours the mixture should double in volume (at least), at which point you are welcome to mix it up a bit, releasing the CO2 and reducing the volume of the mixture temporarily (not a necessary step, I only do this to keep the starter from overflowing the container). In my case, the starter I prepared and photographed for this section tripled in size in less than four hours, requiring me to move it to a larger bowl to continue aging. It seems my culture is quite healthy and active today.

From this...

To this, in less than four hours.

There really isn't a set time that the starter will need to age before continuing on to the next part of the process of breadmaking, but it will need to sit out at room temperature for at least 24 hours to move from "white bread" territory to "sourdough". After much trial and error, I've found the sweet spot for my culture and conditions to be roughly 48-72 hours for distinct sourdough flavor, and it will likely take some experimentation on your part to find what works best for you. Use your eyes and nose, and let the yeast tell you when it's time to make dough. The starter will darken slightly, be gooey and full of CO2 bubbles, and have gone from smelling slightly sour and bready but mostly like flour to smelling kind of like beer* with a more pronounced (yet pleasant) sour note. This odor means that the process of fermentation is well under way and our yeast is hard at work getting ready to make some exceptional bread.

After the first 12-24 hours, the yeast will have metabolized roughly half of the flour, and the rate of reproduction will begin to slow down as fermentation continues. From here on out, the starter will not increase in volume much at all. Don't worry, though... that yeast is still very much alive and the flavor and aroma will continue to develop the longer it is left to age. As I mentioned before, at some point during the second or third day my starter will be ready to be made into dough, but again, feel free to experiment and enjoy the results. I wouldn't let it go more than a week, as at that point the yeast has produced enough acids to lower the pH to a point where it ceases to be active enough to reliably rise dough. 

Now that we have an aged starter, we're mere hours away from pulling hot loaves from the oven!

*While the species of yeast used for brewing beer (Saccharomyces cerevisiae - commonly known as "baker's yeast") differs a bit from the wild variety we're likely to have cultured from fruit in the previous chapter (Saccharomyces exiguus) the biochemical process and resulting byproducts are identical to those produced while fermenting beer-- hence the familiar aroma.

Next:
Previous:

Artisan Sourdough - Part One: The Culture

Active Culture, Ready-to-use

The primary component in any sourdough bread is the yeast. Commercial yeasts are perfectly serviceable for a wide variety of breads, but in my opinion, the best sourdough is made the old-fashioned way-- with wild yeast. It is surprisingly easy to culture wild yeast at home, as these hardy microorganisms occur naturally on the skins of fruits and berries, to include the wheat that is used in the production of the most commonly used baking flours. 

My preferred method of culturing yeast for baking begins with fruit. Strawberries, blueberries, raspberries, plums, peaches or even apples would be appropriate, though the softer fruits such as the berries are easier to work with.

Here's what we'll need:

  • 1-2 pounds of fruit, enough to produce one to one and one-half cups when juiced.


  • 2 cups of flour (preferrably unbleached, but all-purpose flour and bread flour will work. (DO NOT USE SELF-RISING FLOUR. The leavening agents present in self-rising flour will stunt the growth of your yeast colony, if not prevent it from growing at all.)


  • Approx. 1 cup of water.


  • Jar with lid, 16oz or larger.


First remove any seeds, pits or cores from your fruit. Crush by hand (or puree/liquefy in a blender or food processor) until soupy, and strain the juice into a container. Leaving some pulp/skin in the resulting juice is fine, as there won't really be any of it left by the time you get to baking. 

Next, add two tablespoons of flour to the jar, along with two tablespoons of the fruit juice. Mix together until  a wet, loose dough forms. Cover the jar lightly (not airtight!), and leave out at room temperature.

Now we have the be a little patient, as this part of the process involves mixing in another 2 tablespoons of both flour and juice every 24 hours for 5-7 days, then substituting the juice with 2 tablespoons of water for an additional 3-7 days or so. As you approach the two week mark, the little doughball should have grown a little bit, and begun smelling bready and a bit sour. It may even develop a little clear or yellowish liquid on top of it between feedings, this along with the odor is normal and a result of our yeast colony doing exactly what we want it to do, eat and reproduce. 

Over the previous two weeks, we've taken a handful (relatively speaking) of yeast cells from some fruit and grown it into a colony numbering in the hundreds of millions, if not more. As they've fed and divided, they've produced some of the things that make sourdough taste the way it does, primarily lactic and acetic acids (and a fair bit of alcohol, which mostly what that liquid that accumulates is comprised of).

The final step involves the preparation of the culture for use and storage. While we have at this point created as much as a half a cup of culture, we're going to need more than that if we want to bake and maintain the culture for future use. Add approximately 1 cup of warm water and 1/2 cup of flour to the jar, or enough to fill it about 3/4 full before mixing. You can mix this with a spoon or put the lid on the jar (you still have the lid, don't you?) and shake it to mix the culture with the massive amount of food you just gave it. 

Nice, clean jar and some fresh food for the colony.

The resulting mixture should be thinner than pancake batter.

We now have a yeast culture ready for baking! It's been a long couple of weeks, but the culture we've produced will easily last indefinitely if fed and stored properly (discard half of the culture and feed 1/2 cup each flour and water once a month if you haven't used it). For the most part it will live in the refrigerator, the yeast eating and reproducing at a much slower rate, until the next time you use it. It will likely develop separate into dense doughy substance and a clear to yellowish liquid over time, this is normal and you can mix it up before use or dispose of the liquid (compensating for with water in your recipie), if you so choose. The key is to leave 1/4-1/2 cup of the culture in the jar when you bake, and feeding it water and flour before returning it to the fridge. If I'm planning to bake again soon I'll feed it 1 cup each of flour and water, otherwise 1/2 cup each and mix well before putting it away. It will exist fine at room temperature for as long as a week or two if you're baking frequently, but any longer than that and you potentially risk spoilage.

Culture ready for storage.

To wake the culture again, simply set the jar out at room temperature for a few hours, then feed equal parts flour and water to make however much is needed at the time, plus the aforementioned 1/2-1/4 cup leftover to maintain the culture. I most commonly use one cup of culture when baking, but more may be needed if making larger amounts of baked goods. While I primarily make sourdough breads with mine, you can substitute one cup of culture for 1/2 cup each of flour and water in pretty much any bread, cookie or cake recipe. Feel free to experiment and enjoy the results!

Next: